Thứ Hai, 17 tháng 7, 2017

Golf cart pop up card- Land Rover pop up card


Land Rover pop up card

Land Rover Defender is a large high rider, a car in which you meet other cars that are also impractically large on urban streets. It’s a British four-wheel-drive off-road SUV appropriate to the price bracket: smooth, willing, effortless.
We replicate a red Land Rover on a family picnic trip in this pop up card design. The fun color combo will wow any recipients on opening this 3D card.

Golf Cart pop up card

Spending a fine sunday gathering the troops and taking on a spectacular golf course is an idea weekend plan. This high class sport has inspired us to create this cute paper art. The pop up card has a classic white cover that illustrates a gorgeous golf cart. On the inside, you will find a striking red club car standing on green grass. Wrap together some loving words and the card will sure make the recipient happy.

DIY kitten bookmarks

Often times we never quite finish a book, and we're always left looking around for something to hold our page. Instead of using random scraps of paper, Let's whip up these super colorful and cute DIY kitten bookmarks out of paint chips! Now we have tons of cute cat bookmarks lying around to mark our pages all summer long! Ready to make this adorable bookmark? Let’s get making! Materials: • Paint Chips • Craft Knife • Scissors • Cutting Mat (or a piece of cardboard) • Permanent markers • Pencil • Eraser • Ruler (or straight edge) Step 1: Let’s get rid of any unwanted words from your paint chip. Use a ruler to draw guiding lines around the words. Then, cut them out. Erase any leftover pencil marks. Step 2: Use your pencil and permanent markers to draw the shape of a cat. Make sure you draw the arms long enough so that they’ll hold onto your page. Step 3: Use your scissors to cut out your cat’s ears. Then, use your craft knife to cut around your arms. Depending on how sharp your knife is, you might have to retrace your cut several times. Erase any stray pencil marks and gently pop out your cat’s arms. Tada! You’re all done! These are so easy to make, you could probably make a small army of cat bookmarks while watching your favorite tv show. And if cats aren’t really you’re thing, no worries. You could also try making other animals. I’ll bet a dog, fox, or elephant would look super cute too!

Thứ Tư, 12 tháng 7, 2017

DIY GLITTER TRAY


TOTAL TIME: 30 minutes


SUPPLIES
Acrylic Custom Photo Tray
Assortment of Glitter
Computer Paper
Hot Glue Gun
Bowl


DIRECTIONS

1. Combine your different glitters in a bowl until you have a mix that you like.

2. Pour some of the glitter mixture onto a piece of computer paper and slip the end of the paper into the opening of the tray. Pour the glitter inside. If you want the glitter to be able to move around like ours does, you'll want to fill up about 1/2 to 3/4 of the tray. If you want it to just be completely glittered and not move around, you can fill the whole thing!

3. Once you're happy with how much glitter is in the tray, it's time to seal it up! You're going to fill the edge of the opening with hot glue to close it off. Run a thin line of glue right inside the opening of the tray, working a few inches at a time. If you got any excess glue on the outside of the opening, you can wipe it off before it sets completely. It's best to hold the tray over a piece of paper the first time you tip it over to make sure you didn't miss any spots, just in case you did! Then go back and fill it in.


 You can make a DIY glitter tray for your desk (it’s the perfect letter size!) or to hold makeup or jewelry, the works! Whatever the business is, the tray’s filled with glitter. So you need it.


Thứ Hai, 10 tháng 7, 2017

Hanging planters for your new home

Having hanging planters is a cool way to refresh your New home

Materials
  • $5 hanging planters from dollar spot area at Target
  • flat finish house paint (any color)
  • paint brush
  • rope
  • scissors
  • washi tape

Instructions
When I got home with the planters, the first thing I did was remove the flimsy string from each planter. I didn’t like how thin the string was or the color. So, it had to go.
Next, I mixed up some custom colors, using my never ending supply of house paint. I swear I have every color under the sun at this point and it’s a lot of cans to keep at the studio BUT I love using flat interiors paint for projects like these (and pretty much everything really) because of the durability and matte finish.


Once I had my three colors mixed, I painted each planter with 1 coat of paint (1/2 way down the inside of each planter, and all the way around the outside including the bottom, since that will show when the finished pieces are hanging). I waited about 30 minutes for the paint to completely dry (the planters are porous so it didn’t take long for the paint to absorb and dry) and did a few touch ups where it was necessary.
Then, I cut long pieces (2-3 feet each – you’ll need 2 pieces of rope for each planter) of thicker rope that I already had, added a little washi tape to each end to make it easier to thread the top through each hole, and threaded the rope through. Once I had both ropes through, I tied the long pieces at the top into a strong double knot. That’s it.


Thứ Hai, 3 tháng 7, 2017

Disney Princess Pop Up Card

We know that many of you are Disney princesses in disguise, and we think it’s time to let your inner royalty shine! With many amazing Disney princess pop up cards from CharmPop, Let's cherish fancy princess moments with us. Elsa pop up card has a blue cover with a Frozen logo pattern. The image reveals just enough of the surprise inside. Open the card and you will find a stunning three-dimensional sculpture of the Snow Queen- Elsa, wearing her magical icy dress. We also embellish the dress with sparkle prints. 
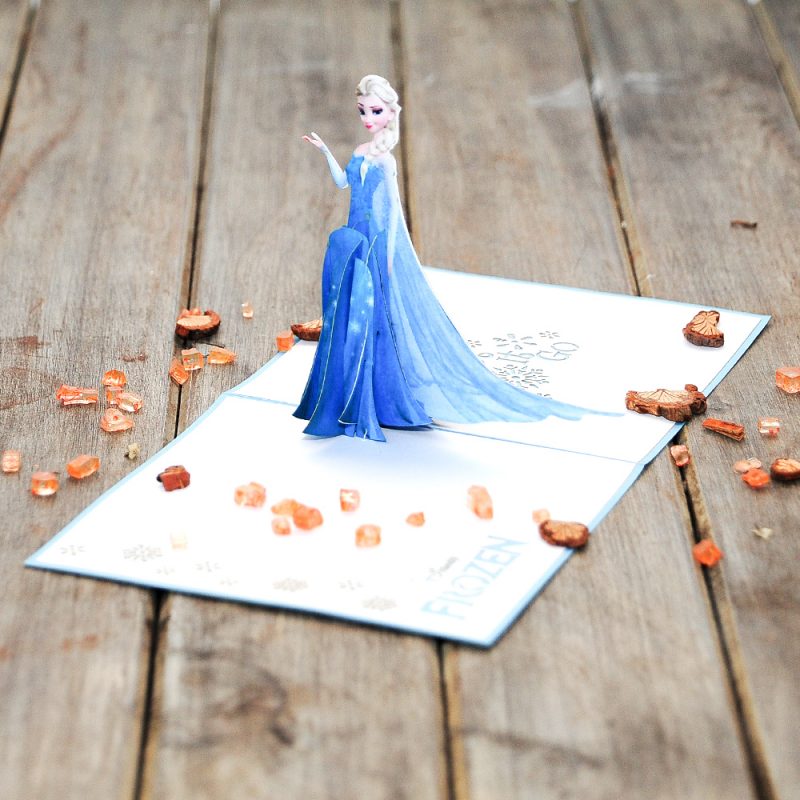
Getting bored with Disney princess who always waits for her prince? Sure you will love beautiful and strong Elsa. Queen Elsa of Arendelle is a Snow Queen with a warm heart. Elsa is the only actual queen of the Disney princess' group, which makes her slightly cooler. The ruler of Arendale doesn’t need a King at her side. She’s an independent woman, natural leader, and fierce defender of those she loves. Be inspired! Cinderella pop up card has a blue cover with a Cinderella shoe pattern. Open the card and you will find a stunning three-dimensional sculpture of the famous Cinderella, wearing her magical dress in blue. We also embellish the dress with tiny flowers and sparkle prints.   
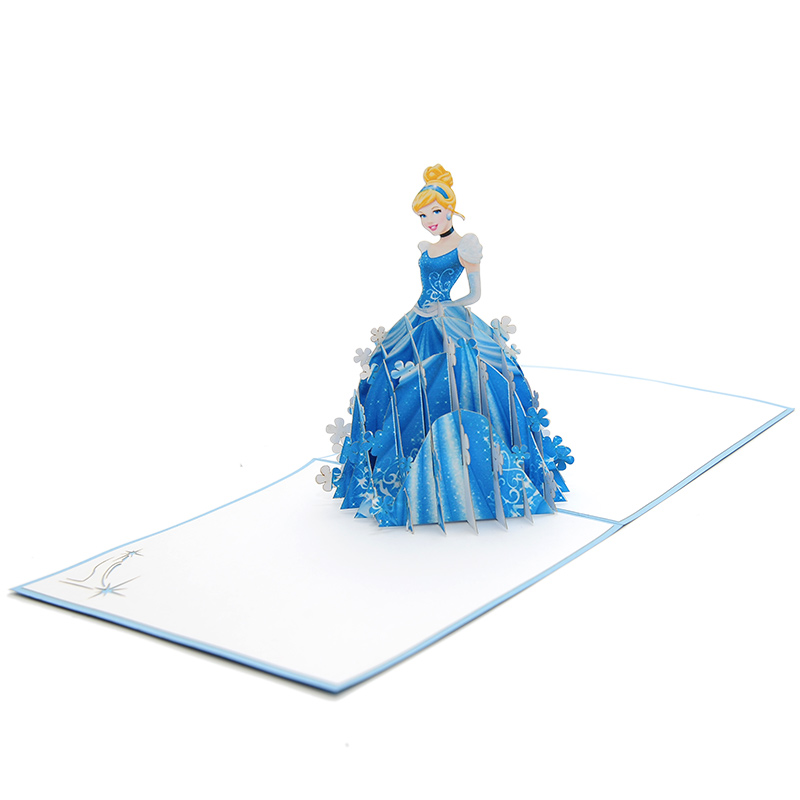
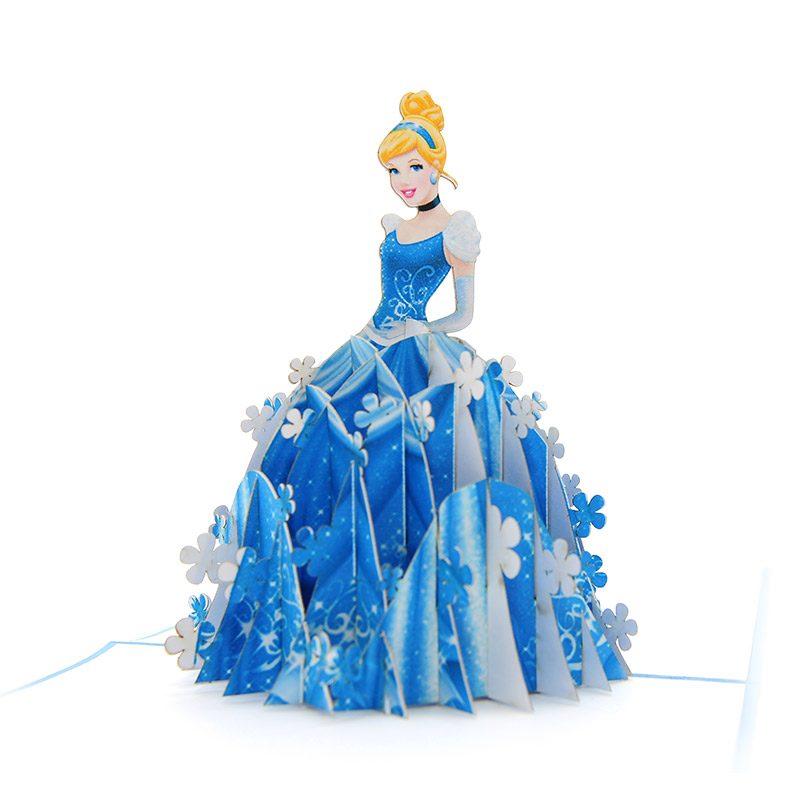
“A Dream is a Wish Your Heart Makes”. Cinderella enchants the handsome Prince Charming at the ball with the help of her fairy godmother. Sure no fans can ever forget her magical blue dress. Among the princesses, Cinderella is considered the Queen. She is always front and center in the groupie pic, making her the leader of this Disney clique. This princess represents the girl who is always dreaming of a rags-to-riches transformation. Both of the cards is best suitable as a birthday card, or a Quinceanera gift for any girls. This pop-up card will be just perfect for any princesses on any occasions.

Thứ Tư, 28 tháng 6, 2017

Flamingo Party Ideas

In case you haven’t heard, flamingos are currently the “it” motif of the season. But they’re not just confined to your wardrobe or home decor anymore — flamingo-themed parties are officially becoming a thing… so say the party gods at least. With the official arrival of summer just around the corner, there’s no time like the present to share our mutual love for all things pretty + pink. Call up your closest gal pals and get ready to celebrate with these flamingo party ideas.

Tropical Flamingo Pool Party


Tropical Flamingo Birthday Party


Modern Flamingo Birthday Party


Flamingos and Pineapples Tropical Birthday Party


Cactus + Flamingo Themed Summer Party


Tropical Flamingo Paradise Birthday Party


Thứ Sáu, 23 tháng 6, 2017

Flamingo Marquee Light DIY

It’s the year of the flamingo! There are so many ways to let your flamingo flag fly, from pool floats to themed parties to home decor. Why not add just one more DIY to the ‘mingo mania?


Materials: 
  • foam core
  • large scrap paper 
  • illustration board
  • string lights
  • spray paint (primer and paint)

Tools: 
  • pencil
  • ruler
  • scissors
  • hot glue gun
  • cutting mat
  • X-ACTO knife
  • screwdriver

Instructions: 

  1. On a large scrap of paper (about 18 x 24 inches) draw the outline of a flamingo. Start with an S shape for the flamingo body and sketch away! Cut it out with scissors. 
  2. Trace the paper outline on your sheet of foam core. 
  3. Use an X-ACTO knife to cut the flamingo outline out of the foam core. 
  4. Optional: Use sandpaper to clean up the edges. 
  5. With a ruler, measure the distance between the string lights (mine were two inches apart). 
  6. On the flamingo board, draw a dot where you want the lights to go — remember to leave two inches between the dots. 
  7. Using a screwdriver, pierce the foam core where you marked the dots. 
  8. Cut strips of illustration board 1 1/2 inches in width. Use a hot glue gun to attach it to the sides of the flamingo. 
  9. In a well-ventilated area, spray the flamingo first with primer and then hot pink spray paint.
  10. Once dry, poke the string lights through the holes in the flamingo and turn it on.

Pro-tip: When you’re cutting the flamingo outline out of foam core, lightly score or drag the X-ACTO knife along the lines a few times before you apply more pressure. This will make a cleaner cut.